 NOTE: Want to watch an Instruction Video for the below that has a template? Just go to Deana Zhollis Writing Tools
.
Sigh. Another milestone that I had to accomplish. Formatting my book.
I remember, somewhere in my mental database, authors complaining about page numbering and book layouts. I thought, “No big deal.” I’m pretty good with MSWord and such. Shouldn’t be any problems.
WRONG!
I can’t tell you how many hours and hours I spent trying to get my book to layout the way it’s suppose to. I never knew it could be so complicated. Hopefully I can remember all of my steps.
STEP 1: FIRST FEW PAGES
LuLu doesn’t really give you the “start pages” information–at least I didn’t see it with my quick overview. So, I pulled down five (5) books from my bookshelf and took a look at what they had, and on what pages. Every book was different. One might have a small snippet of the book on the very first page, while others had prologues on third or fifth page. Some had review quotes on the very first page, and other had the title of the book. So, basically, I had to just pick what I wanted. I put my beginning pages for my book in this order:
- Page 1 – A snippet of the story
- Page 2 – Copyright information, book designer, ISBN, “this book is fiction” info
- Page 3 – Dedication
- Page 4-6 – Illustrations
- Page 7 – Table of Contents (go here on how to created on in MSWord)
- Page 8 – blank
- Page 9 – Book title
STEP 2: PAGE LAYOUT
This part I’m not quite sure about since my book is so big. I’m not sure if I formatted for printing correctly. I’ll find out once I order my book and it comes in the mail. LuLu gives you some general information, and that all depends on the size of the book, so for my 461 pages (this page number counted changed several times–more on that later), I went on the internet and found some general information and Under FILE > PAGE SETUP formatted liked this.
- Margins: Top, Bottom, Right, Left – All to 0.5
- Gutter: .25 (This is the crease of the book)
- Multiple page: Mirror margins
- Paper size: Width 6″ and Height 9″
- Layout: Section Start: Odd Page
- Checked Different odd and even
- Checked Different First page
- From edge: Header 0.25″ and Footer 0.5″
Make sure to Apply to “Whole Document” for each tab of the Page Layout
- FORMAT > PARAGRAPH…First Line Indent .25
- Font Style: Palatino Linotype and Font Size: 12
- Modify Heading 1 Style to have:
- Paragraph: Alignment: Center
- Hanging 1.2″
- Spacing Before: 12pt and After: 6pt
- Font Style: Palatino Linotype and Bold and Font Size: 14
- Line Spacing: Single
I mostly got this format from the small publishing site called Trafford, but it’s not longer on their page.
STEP 3: SECTION BREAKS ODDS/EVENS
Now, you remember the first list of pages on Step 1? After each page I put in a section break. After the “snippet” I put in INSERT > BREAK > EVEN PAGE. Remember, a book has a left and right side, so you have to tell MSWord how you want the pages to appear. You can just put Page Breaks and try to get the pages to line up right, but that’s pretty cumbersome to deal with. The very first page has to be on the right side, the ODD PAGE, so the PAGE SETUP makes sure of that. However, the Section Break (Even Page) makes sure the next page is on the EVEN PAGE. I had to alternate the Section break from Odd to Even for the first few pages before I got to my chapters, and then at the end of each chapter I enter a Section Break (Odd Page), to make sure all of my chapters begin on the right side of the book. To View how it would look, you have to see it in PRINT PREVIEW, and then select to see multiple pages.
This was a real pain to figure out
STEP 4: FONTS
I initially had my book in Courier and double-space, your know, for sending it out the traditional way to publishing houses, as well as LEFT JUSTIFIED. But then I had to figure out the font I wanted to use for printing, and had to change the paragraphs to JUSTIFIED, as well as taking out the double-space after the period and inserting a single-space. I must be old to not know that we don’t need to double-space anymore. Sigh. The things we learn. So, I started off with Lulu, since my research said it was the easiest to use to get your feet wet. Not too easy! If LuLu is easy, then I hope I have enough experience there to go to CreateSpace!
Well, anyway, LuLu had a great section on book formatting, and basically gave me three choices of font: Garamond, Times New Roman and Palatino (there were others, but those were the basics). Well, then I started playing around with the fonts, and since I had a lot of italics, I had to pick a font that was readable in italics. Well, I started with Garamond, which was cool, but not so cool with italics. Times New Roman just didn’t look right to me, and so I went to Palatino, but in my MS Word I had Palatino Linotype. So, I figured that was the same thing. But I had different styles and fonts all over the place, even though I used Select All and changed the font to a universal one. LuLu still thought that there were fonts there that I knew I wasn’t using when I tried to upload. So I had to learn how to EMBED the font into my pdf file. This makes it so that if a document had a font that isn’t on someone’s PC then the PC can still read it. Fortunately for me, I have Adobe Converter, but for those who don’t, they find places for free like PDF2Go that converts to up to 100mb here without needing to purchase Adobe.
I also downloaded CutePDF which can convert jpg and almost anying to pdf by simply opening the jpg in your normal software (Like Microsoft Office Picture Manager or GIMP), select the FILE > PRINT, and change your printer to CutePDF Writer and it will convert it to pdf. And that software is FREE!! I also downloaded it from NiNite that has all kinds of neat stuff, including GIMP .
So embedding fonts directly into the document using these instructions got me half way there. It still didn’t recognize my fonts when I tried to upload, and then I found out there’s a NEVER EMBED section, that I had to take out all the fonts in there and convert my MSWord to pdf again.
Converting from MSWord to pdf, I tell you, takes some time. About 5-10 minutes for my PC. It might have been more if I had a slower PC.
And uploading takes even more time, 42 minutes LuLu told me, but on Thanksgiving, late in the evening, it took no time. So I would suggest uploading on non-peak hours.
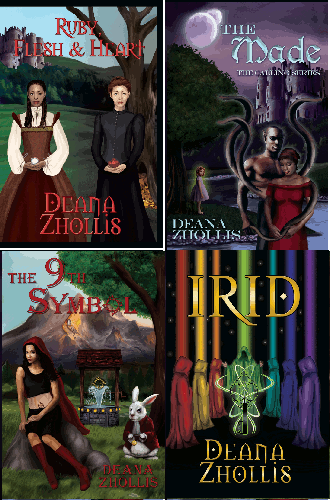
STEP 5: BOOK COVER
You can created a barcode like places that have barcode generators like here and used GIMP to edit it and put it on my book cover. It looks a bit too big on the back of the book, but making it smaller diminished the print. So, when I do get the book, I’ll take a look at it. I found the size of a barcode, which they say is: 2.938″ wide x 2.04″, but like I said, using the free barcode converter, shrinking the size didn’t look too good.
You have to upload your book cover separate, and also in pdf format, not picture format, for LuLu. Since my book cover was in jpg, and I already had Adobe, I just open the jpg in Adobe and it automatically converted. But as I said, you can also install CutePDF and print it out as a pdf file (Did I mention that software was free. Heh.Heh.). Also, I had to resize the image to LuLu’s standards, which they give an example of a 6″ by 9″ book will need an image 6.125″ by 9.25″. But, again, since my book has so many pages, my size was 956.25 X 666, suggested by LuLu, but GIMP (remember, GIMP is free) converted it to 956.6 X 664.8. LuLu took that size just fine though. I didn’t have to do all this since my book designer is going to provide the formats and files for my book so I could use, but I wanted the experience on doing all of this just in case I needed it.
STEP 5: PAGE NUMBERS
Remember all those section breaks? Well that really helps with my Header. I went to the second page after my first chapter title and put in the author’s name. Author’s name will run on the even page numbers. Then I went to the fourth page and enter the book’s title, and that will run on the odd page numbers. This is setup on the FILE > PAGE SETUP where I put a checked mark by “Different odd and even and check mark by “Different First page”. The “Different First page” allows for each first page of a chapter (remember, separated by Odd Page Section breaks) so that a page number is not printed. I wanted to have each chapter with the Chapter’s name on the Odd page, but with the numbering issue, needing it to continually run chronologically just in case I had to add more or delete more text, having separate Chapter names effected my page number since each section had to be different from previous section. I left it as simple as possible with the running Title and running Author Name. I inserted a page number, using the Header and Footer toolbar, and then clicked the Format Page Number, and changed the Page Numbering to start at 1. I had to start at 1 in order for 2 to show up. If I wanted the page to star with the number 1, I would have had to put in a zero (0). After a few trail and errors of making sure the Header was, or was not, “Linked to Previous” section I finally got it. It’s doesn’t make since though, since my 2nd page is “Linked to Previous” section and though it shows the title of the author in “Header and Footer” right after my Table of Contents, when I’m out of that mode, it doesn’t show but where I want it. Go figure. But I did have to go to each chapter and make sure the Page Numbering had “Continue from previous section” instead of “Start at” where each chapter started with page number 2
STEP 6: WAIT
Now, just waiting for LuLu to give me the ok, to order my book. In the mean time, I went to www.BowkerLink.com and registered my ISBN, and hope that everything works out okay with the first print.

