Archive for the ‘Self Publish Progress’ Category

Paperback or eBook?

I spoke at a High School about Self-Publishing earlier in February. It was a small school with about 500 students. I say it’s small because my Senior graduating class in California was 900 students. For me, this was a small school. While there, I watched and listened to some of the students after my presentation was finished and answering questions (and before the bell rung for the next period), and it reminded me that not everyone has the privilege of having internet access, let alone the funds to purchase an eReader. Some of them didn’t know what a “blog” was, but they have heard of Facebook and Twitter, though most didn’t participate in it.

I’m going to repeat what I wrote in a comment…

When I travel, I’ve been trying to count how many people in airports use print versus eReaders. It’s been about even in some areas, and then there were all eReaders, and then some mostly print. It’s still a mixture of both depending on where I was. Plus, when I speak to people about my book, the first thing I still hear is, “Where can I get it?” When I tell them it’s online buy only, they’re like, “Oh” and that means, “Nevermind…not for me.” I then tell them they can order the print version from online too. I see their face lift for a moment, but I still get that feeling like, “Oh..I don’t do that much internet shopping.” LOL!!

I had to change my mindset about digital taking over print…and it will, but it still will take some time.

For me, I still get money from eBooks than Paperback, so I focus there. HOWEVER, it’s really easy having paperback available via CreateSpace which is owned Amazon. I have not sent my latest book (The 9th Symbol) to Lightning Source yet (a lot more work and money needed versus Createspace which is very easy), because I just don’t see any revenue there. YET, I do have the files available when I am ready to put it there. It’s just that Barnes and Noble doesn’t have a paperback copy of my latest book…just Amazon does. Yet…hmmm… CreateSpace now has a way to get my paperback to Barnes and Noble for just $25 (see CreateSpace Expanded Distribution), which wasn’t available before, but it is now.

So, for those who want paperback, it’s easier to go down that lane now using CreateSpace.

Doing both format does require some work, but I’ve made templates that you can use…free (you know my favorite ‘F’ word 🙂 ). Just go to my Tools Website and download it.

Either way, make sure you’re putting out the best product you can, because people will be looking and tongues are slick and harsh on the internet world on reviews. Having a good product would at least avoid some of that, and increase your sells when word spreads on recommending your book.

Until Next Time!

The Lone Self-Publisher

LoneAuthorWhen grandeur from a novel doesn’t come readily, people give up.

It is hard to carry on when you hear of those shouting their victories of yet another hundred, or thousand, goal has been reached; their dreams of their novel being purchased excelling and…you are not one of them.

I have watched those with novels suddenly vanish from the internet. Sometimes it is life that comes into play, and one must put their dream on hold for awhile, but I see the difference in those authors, because they say a farewell, and let the social network know that they have more pressing things to attend to. Then there are those that seem to disappear in the middle of a sentence, their URL address only giving an “unknown”.

It can be a lone travel when the purchases of your books is only a trickle. Yet it is the trickle that an author should rejoice in. That is one more person in a sea, an ocean, of billions of people who have found your book and chose to go into their personal pockets to purchase. It is one more pair of eyes, which share in the story you gave. So, yes, months may go by before another pair of eyes set upon your novel, but it is yet ANOTHER that has done so.

Each single, solitary book that is purchased is another step closer to receiving that flood of recognition. A trickle of water can still carve canyons. It takes time. And no, you may not be an Amanda Hocking, a Joe Konrath, a John Locke, but your story will be shared to many, which stands the importance of your story…to be shared.

Do not loose sight that you only write for yourself. If so, then you wouldn’t have it on the internet. It would be locked away, with a latch and key, like a diary should be. Do not fool yourself that money is not one of your goals, because the majority wishes to be famed, and what is fame without fortune. And to have fortune doing something you love is a dream in itself. And if it is not for fame and fortune, then it is for payment to stand self-employed, stand with freedom, to work your own hours to continue your art, your creativity, to share with the world.

When you write, you write alone. When you self-publish, you publish alone. But when one pair of eyes read your words, your voice speaks, and you are alone no more…but now sit with an audience.

Is Self Publishing Worth It?

There are so many questions pertaining to Self Publishing.
Is Self Publishing Worth It?
Is Self Publishing Profitable?
Is Self Publishing Easy?
Is Self Publishing A Good Idea?
Is Self Publishing Bad?
Is Self Publishing Really Easy?

I have asked these questions at one time or another, and repeat them even today though I’m going on three (3) years of having self-published books. I’ve had to remind myself of my priorities and what led me to actually take the steps to self-publish.

Is it profitable? For some it has been, but not for me. So, I’m not receiving as much money as I’ve put out, but the reason I decided to try my hand at self-publishing was because of the $25,000.00 I put into my wedding and honeymoon. Yes. $25,000.00!! A wedding put things in perspective. That was a lot of money put into my wedding for just a few days. My self-publishing efforts? Not even CLOSE to that much money, and my self-publishing is ongoing. I didn’t make a cent in 2009 and 2010, but 2011 was filled with readers and $$ that can pay for a few dinners. The main point was not the money, but to find a few readers, strangers, who would say that they enjoyed the story that I wanted to share. And I am so ever pleased to hear a few voices that continue to say just that.

Is it worth it? I must say that I am quite happy every time someone finds me and buys one of my books. It makes my day. The money I’ve put into it has been well worth it for just reaching one more person with my stories.

Has it been easy? For me. No. I would suspect it wouldn’t be easy for anyone who cares for the product of their work. The story must be scrutinized so that the writer doesn’t stay ignorant that their writing is “different” and “extraordinary”. In order to know what kind of story you have, strangers must become the audience, not friends and family. It is strangers who you want to enjoy and share with your creativity. I’ve also had to learn almost a dozen knew software to operate for my website, blogsites and even for writing (i.e. yWriter, Adobe, other features in MSWord). So my technical skill took a huge S T R E T C H.

Is it expensive? It doesn’t have to be if you do most of it yourself and take the many, many months to learn the software and craft of photo editing and writing and html or epub format. It could be completely free if you just upload and create only an ebook, but you must follow the programming and specifications of the distribution company (i.e. KDP Amazon, Smaswords, PubIT).

Is it bad? No. Many authors are self-publishing. It is only bad if you don’t learn from others on what a good product is. If you don’t seek help, then the product won’t be it’s best. When your art receives positive comments, it is then that you know that you have done well, and it is then that you will have your validation. You won’t need to have that need anymore to be validated by a publishing house, because you have received it on your own. And that’s how it’s been for me.

And my path has been an fun, self-fulfilling, and an extraordinary one :).

Until Next Time.

Power and Rainbows – Octavia Butler

Sometimes the lack of something in a young person’s life, or concentrated and continuous reception of pain, would form a hyper-creative mind.

I was reading over a transcript I had printed out on a forum with author Octavia Butler as the guest. It was in 2001 where the moderator/host was Ben Trumble for SCIFI. It was a promotional tour mainly for the novel Kindred which had been adapted into a four-part audiodrama miniseries for SCIFI.COM.

During the discussion, Octavia was asked the question about power…

QUESTION: “Ms. Butler, many of your novels deal with power relations: the gifted vs the normal, the time-traveler who knows vs. the manipulator. What about power interest you so much as a writer and human being?”

BUTLER’S ANSWER: “I don’t feel that Dana has power in Kindred, and only a little knowledge. Power is what she needs. Power does interest me. I grew up feeling so powerless, not only because I was Black and female, but because I was so shy. I wrote about power so I could understand it. It still interests me in the way that people use it. It’s such a part of being human.”

At those times where someone lacks power, the natural deepening of creativity explodes.

During the SCIFI discussion, Octavia states: “I used to live next to my landlady and I told everybody she inspired me. And you don’t need imagination because everybody has it. We carry it from childhood. And forget about talent. If you have it, wonderful. If you don’t…read a few best sellers and see who else doesn’t have it, then get to work.”

She stated that she began writing Science Fiction before she began reading it, or at least recognizing it.

And even after finally getting published, she still had to deal with a complete disregard when it came to her creative art.

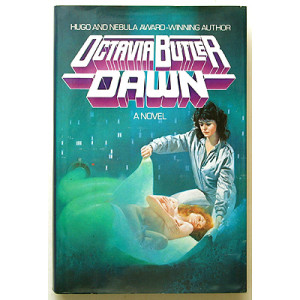
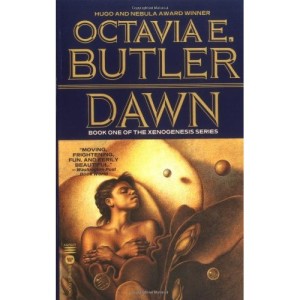
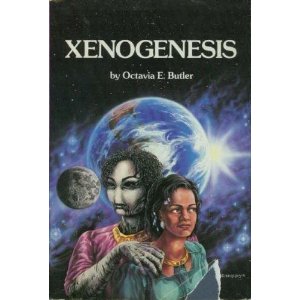
First Cover Newest Cover Trilogy Cover

QUESTION: “I recently had a chance to see an earlier print of Dawn and on the cover was a Caucasian woman pretending to be Lilith. What were your reactions when you first saw that cover?”

BUTLER’S ANSWER: “Well, my reaction was the same as when I first saw any of my early covers. Writers have no control over that. Well, maybe Stephen King. It’s the luck of the draw and sometimes there is no luck. I think it was the marketing ideas of the time. Black people don’t read SF. Blacks on the cover don’t sell books. As my books sold more, that changed. I literally outlived the adversity. I have editors now who actually care what I think. My early editors frankly didn’t. They’d send a cover and say, “Isn’t it beautiful!” If I thought it wasn’t, that didn’t matter. They would explain to me why I was wrong.”

Octavia stated she received the audio script of Kindred as a finished product. She didn’t get a chance to view it before it went into production. She stated in the discussion that the audio told a different story than the one she was telling, but (she added as a positive note) it did what it did in a very interesting way. She also added another positive statement that she liked the way the slave narratives were handled.

When I read those two positive statements from Octavia about the audiodrama, I still could hear the disappointment, and perhaps even the anger, of these people who took it upon themselves to take her creative art and do what they wanted, only to tell her: “It’s All done! Look! You should be thankful!”

Today, though, one’s inspired creativity from the darkness of childhood experiences, can be shared to everyone exactly how the author intended it to be. Self-publishing allows just that. It takes time to see those beautiful lights of the rainbow especially right before the dark scenes of life. And I’m so glad that today has the true freedom of expression–the way that it was intended.

Authors, like Octavia, helped to pave that way, with their silent acceptance of what they couldn’t change, but bursting their light through in places where they could.


Octavia Estelle Butler (June 22, 1947 – February 24, 2006)


As most know, every story that has ever been written has already been written. While I wrote in my young age, I never came across any stories similar to mine, until I picked up Octavia Butler’s book. I had no idea she was a Black author because of the cover, and a few years later, I picked up another book in the library, and started reading, and yes, I had already read it. It was Dawn, and I had now the Trilogy, and the excitement, to read the next few books of this story. That was in the early 1990s, during my college years. I had hoped one day that I would have the honor to someday sit down and speak to the wonderful author who wrote so similar to my own thoughts and imagination, but unfortunately, it would now never be.

Today, I can only continue my version of story telling in the similar steps as her own. And I’m happy to be able to do just that.


Template to format your MSWord Novel to Kindle

I’ve put together how my book was constructed for the Kindle. I used the preview in Kindle to make sure it looks okay.

NOTE: Want to watch an Instruction Video for the below that has a template? Just go to Deana Zhollis Writing Tools.

The first step for the html programming I found on Critique Circle. I’m not a member. I actually was looking for something else and found this nifty way of getting your MSWord ready for html. If you use the MSWord converter, it just creates a whole lot of garbage html stuff that you really don’t need. Thus, if I had known this neat and quick way to change my MSWord to html WITHOUT loosing my italics, I surely would have used it instead of copying and pasting each-and-every-chapter into my Dreamweaver (for FREE html software, try out Kompozer. I downloaded it and it works great!), and then I had to compare my MSWord document to the HTML to put the darn formats back in. Not fun. But this now saves me a lot of headaches.

I’ve edited Critique Circle’s instructions to make it more general.

STEP 1

You can convert bold, italics, underline and centered text in MS Word to html formatted text before copy/pasting your text into your html programming/code window. In this way, you will not loose your italics, for example, when you copy/paste. The below instruction explains how to do this with bold and then you can use the same steps for the other formats

To do that, open up MSWord document and then open your find-replace option (CTRL-H), and make sure you are working in a throwaway copy of your manuscript so that you don’t accidentally save over it.

In the find-replace dialog, make sure you have your focus in the “Find What” text box (just click it) and then click on the “More” button, at the bottom of the dialog. There is a “Format” drop-down button. Click that and select “Font”. Now, select “Font Style” and then “Bold” and click OK.

NOTE: There is an easier way. You can press CTRL-B to toggle bold, CTRL-i to toggle italics, CTRL-u to toggle underline and CTRL-e to toggle centered. Just remember to have your focus on the “Find what” box and use the “Clear formatting” or “No formatting” to clear out previous formatting before entering a new one (ex. it might say “Not Bold”, which is not the same as not searching for bold text. In this case you should hit CTRL-B again to clear the bold flag)

Under the “Find What” text box, you should now see “Format: Font: Bold”.

In the “Replace With” text box, enter [b]^&[/b] and click “Replace All”.

This will find every piece of Bold formatted text and encase it with [b] and [/b].

Do the same with italics, underline and center (that’s in the “paragraph” option group). In every case, make sure that the option you had before is no longer selected, so that only bold, italics or centered is shown below the “Find What” text box.

Even if you have text that is italics _and_ bold you use the same method.

Here are the codes you want to put into “Replace With”:

Bold: <strong>^&</strong>

Italics: <i>^&</i>

Underline: <u>^&</u>

Centered: <c>^&</c>

STEP 2:

This part includes the following supported html coding the Kindle needs in order to look properly in their viewer. It will include the following things:

<a name=”TOC”/> for Table of Contents right before your Table of Contents

<a name=”start”/> for Go To Beginning where you want people to go when they first open your book

<a name=”cover”/> for Go To Cover where it will display your beautiful picture/cover of your book

<mbp:pagebreak/> for Page Breaks, which I mentioned in an earlier post

I researched if I needed to put the cover (<a name=”cover”/>) in my book or not. I couldn’t find anywhere where people were leaning more to the “to do” or “not to do”, so I left the cover out in my Kindle version. I can always insert the picture later on if I want. I read somewhere that I could put the cover at the end of the book, so that’s where I put it in the example below.

It also includes:

  • Table of Content in HTML
  • A bullet list in HTML
  • Dropped Case in HTML (The first letter of a chapter enlarged or larger)
  • A Glossary
  • A Prologue
  • About the Author
  • And stuff to put before the story begins (ISBN Number, Dedication, Website etc)

So, here goes my code. Hope it’s helpful.

<head>

<meta http-equiv=”Content-Type” content=”text/html;charset=iso-8859-1″ />

<title>{Enter your Title of Book here}</title>

</head>

<body>

<center><h2>{Enter Prologue Title Here}</h2></center>

<br>

<p>{Start the prologue text here}</p>

<p>{And keep on typing it all up}</p>

<hr />

<mbp:pagebreak />

<br />

<p>This book is a work of fiction. Names, characters, places, and incidents are the product of the author’s imagination or are used fictitiously. Any resemblance to actual events, locales, or persons, living or dead, is coincidental.</p>

<br>

<br>

ISBN 10: {Enter Number}<br>

ISBN 13: {Enter Number}<br>

<br>

{Title of Book here}<br>

Copyright {Date} by {Author Name}<br>

All rights reserved.<br>

Published by {Name here}<br>

http://www.{web address}<br>

<br>

Cover Design by {Name here}<br>

http://www.{web address}<br>

<mbp:pagebreak />

<br>

<br>

To my family and friends who ….

<hr/>

<mbp:pagebreak />

<center>

<hr />

<font size=”+4″>{Title of Book Here}</font>

<hr width=”10%” />

<font size=”+1″>by {Author Name Here}</font><br />

<hr />

<br />

</center>

<mbp:pagebreak />

<center><h2><a name=”TOC”/></a>TABLE OF CONTENTS</h2></center>

<br>

<br>

<a href=”#Ch1″>Chapter 1 {Name of Chapter}</a><br />

<a href=”#Ch2″>Chapter 2 {Name of Chapter}</a><br />

<a href=”#Ch3″>Chapter 3 {Name of Chapter}</a><br />

<hr />

<a href=”#Glossary”><font size=”+2″>Glossary of Terms</font></a><br />

<hr />

<mbp:pagebreak />

<a name=”start”/></a><h2 id=”Ch1″>Chapter 1 – {Name of Chapter here}</h2>

<br />

<p><font size=”+4″><b>E</b></font>lephant went for a swim on a cool day. Begin novel story and stuff here.</p>

<p>Last Line of the chapter is here.</p>

<p> <br />

<mbp:pagebreak />

<h2 id=”Ch2″> Chapter 2 – {Name of Chapter here}</h2>

<br />

<p><font size=”+4″><b>T</b></font>he sun went up and then down again.</p>

<p>Last Line of chapter and 1st part of book here.</p>

<p align=”center”><strong><em>The End</em></strong></p>

<hr />

<mbp:pagebreak />

<h2 id=”Glossary”>Glossary of Terms</h2>

<p><strong>Magic:</strong> Used thooughout the entire Novel to make things sparkle and look pretty.<br />

Examples of certain techniques:

<ul>

<li>Song ability</li>

<li> Animal ability</li>

<li> Water ability</li>

</ul>

<p><strong>Poor:</strong> An individual in a state of despair and desperation.</p>

<hr />

<mbp:pagebreak />

<h2 align=”center”>About the Author</h2>

<p> </p>

<p>Lori Jones is an instructor for elephant painting and dancing

<hr />

<mbp:pagebreak />

<center>

<h1>Other Books</h1>

Elephant? Where are you?<br>

<br>

<strong><font size=”3″>(Coming Soon…)</font></strong><br>

Elephant – Together at Last<br>

Mice and Elephant<br>

<br>

<br>

<strong><font size=”4″>The Tusk Series</font></strong><br>

<br>

Tusk – White and Shiny!<br>

<br>

</center>

<a name=”cover”/><img src=”http://www.zhollis.com/images/TheMadewebsite.jpg” alt=”TheMade” longdesc=”TheMade.htm”>

</body>

</html>

Below Code is for Multiple Books within a Novel. It also includes:

  • Table of Content in HTML
  • A bullet list in HTML
  • Dropped Case in HTML (The first letter of a chapter enlarged or larger)
  • A Glossary
  • A Prologue
  • Book I and Book II (Book II has the Chapter Numbers starting from 1 again)
  • About the Author
  • And stuff to put before the story begins (ISBN Number, Dedication, Website etc)

So, here goes my code. Hope it’s helpful.

<head>

<meta http-equiv=”Content-Type” content=”text/html;charset=iso-8859-1″ />

<title>{Enter your Title of Book here}</title>

</head>

<body>

<center><h2>{Enter Prologue Title Here}</h2></center>

<br>

<p>{Start the prologue text here}</p>

<p>{And keep on typing it all up}</p>

<hr />

<mbp:pagebreak />

<br />

<p>This book is a work of fiction. Names, characters, places, and incidents are the product of the author’s imagination or are used fictitiously. Any resemblance to actual events, locales, or persons, living or dead, is coincidental.</p>

<br>

<br>

ISBN 10: {Enter Number}<br>

ISBN 13: {Enter Number}<br>

<br>

{Title of Book here}<br>

Copyright {Date} by {Author Name}<br>

All rights reserved.<br>

Published by {Name here}<br>

http://www.{web address}<br>

<br>

Cover Design by {Name here}<br>

http://www.{web address}<br>

<mbp:pagebreak />

<br>

<br>

To my family and friends who ….

<hr/>

<mbp:pagebreak />

<center>

<hr />

<font size=”+4″>{Title of Book Here}</font>

<hr width=”10%” />

<font size=”+1″>by {Author Name Here}</font><br />

<hr />

<br />

</center>

<mbp:pagebreak />

<center><h2><a name=”TOC”/></a>TABLE OF CONTENTS</h2></center>

<br>

<br>

<p>BOOK I: </p>

<a href=”#Ch1″>Chapter 1 {Name of Chapter}</a><br />

<a href=”#Ch2″>Chapter 2 {Name of Chapter}</a><br />

<a href=”#Ch3″>Chapter 3 {Name of Chapter}</a><br />

<br>

<p>BOOK II: </p>

<a href=”#Ch1_1″>Chapter 1 {Name of Chapter}</a><br />

<a href=”#Ch1_2″>Chapter 2 {Name of Chapter}</a><br />

<a href=”#Ch1_3″>Chapter 3 {Name of Chapter}</a><br />

<br />

<a href=”#Glossary”><font size=”+2″>Glossary of Terms</font></a><br />

<mbp:pagebreak />

<center>

<hr />

<font size=”+4″>BOOK I</font>

<hr />

</center>

<mbp:pagebreak />

<a name=”start”/></a><h2 id=”Ch1″>Chapter 1 – {Name of Chapter here}</h2>

<br />

<p><font size=”+4″><b>E</b></font>lephant went for a swim on a cool day. Begin novel story and stuff here.</p>

<p>Last Line of the chapter is here.</p>

<p> <br />

<mbp:pagebreak />

<h2 id=”Ch2″> Chapter 2 – {Name of Chapter here}</h2>

<br />

<p><font size=”+4″><b>T</b></font>he sun went up and then down again.</p>

<p>Last Line of chapter and 1st part of book here.</p>

<mbp:pagebreak />

<center>

<hr />

<font size=”+4″>BOOK II:</font>

<hr />

</center>

<mbp:pagebreak />

<h2 id=”Ch1_1″>Chapter 1 – {Name of Chapter here}</h2>

<br />

<p><font size=”+4″><b>S</b></font>arah found a wonderful shade next to the elephange</p>

<p>Last line of Chapter here.</p>

<mbp:pagebreak />

<h2 id=”Ch1_2″>Chapter 2 – {Name of Chapter here}</h2>

<br />

<p><font size=”+4″><b>W</b></font>ater fell down from the elephant into her eyes</p>

<p>Last line of Chapter here and last line of the entire book. Hurray! You’re finished! Good job!<br />

<br />

<br />

<p align=”center”><strong><em>The End</em></strong></p>

<hr />

<mbp:pagebreak />

<h2 id=”Glossary”>Glossary of Terms</h2>

<p><strong>Magic:</strong> Used thooughout the entire Novel to make things sparkle and look pretty.<br />

Examples of certain techniques:

<ul>

<li>Song ability</li>

<li> Animal ability</li>

<li> Water ability</li>

</ul>

<p><strong>Poor:</strong> An individual in a state of despair and desperation.</p>

<hr />

<mbp:pagebreak />

<h2 align=”center”>About the Author</h2>

<p> </p>

<p>Lori Jones is an instructor for elephant painting and dancing

<hr />

<mbp:pagebreak />

<center>

<h1>Other Books</h1>

Elephant? Where are you?<br>

<br>

<strong><font size=”3″>(Coming Soon…)</font></strong><br>

Elephant – Together at Last<br>

Mice and Elephant<br>

<br>

<br>

<strong><font size=”4″>The Tusk Series</font></strong><br>

<br>

Tusk – White and Shiny!<br>

<br>

</center>

<a name=”cover”/><img src=”http://www.zhollis.com/images/TheMadewebsite.jpg” alt=”TheMade” longdesc=”TheMade.htm”>

</body>

</html>

Okay. So, that’s what I used for my three (3) books for formatting. I hope this helps you guys out there with formatting from MSWord to HTML a little easier.

Note: the image html would look more like:

<a name=”cover”/><img src=”[imagenamehere].jpg” alt=”[ImageNameHere]”>

To see what it will look like, click <<here>>

Until next time…

Smashwords…Here I am! And…here I go…to Researching Writing Software

I’ve took the time to reformat my books to Smashwords submission process. They require a Microsoft Word format using Bookmarks and Hyperlinks for the Table of Contents. So now I have four (4) versions of my book: 1) HTML format, 2) Kindle format, 3) PDF format and 4) Smashword format.

It’s taken months in between to figure out where I wanted to send my books and if I wanted to do the formatting for them and when to do all of it.

I’m hoping a standard format will come soon, because it’s been a pain to re-format my books to each, individual publisher’s requirements. Maybe the standard might be epub (something I just recently found out about a few weeks ago while researching on the web to find some kind of software that, with a push of a button, it would recreate my books to whatever format the publisher wanted).

ePub

What is ePub? Well, from what I found out, ePub is short for “electronic publication” and it’s a format that allows eReaders like Barnes & Nobles Nook and Sony Reader to read it. A list of devices that support the ePub format is at wikiMobileRead. What it is, is a creation of XML files (mostly XHTML) all zipped up together. It basically makes a file for Every-Single-Chapter of your book. Take a look at a picture of it at addictivetips.

I’ve looked occasionally at MobileRead.com to see what the programmers have to say about all these different “e” stuff, and that’s where I begin to hope for a STANDARD eBOOK FORMAT.

There was one particular forum that someone was asking for a software that produced multi-format ebooks. One person replied stating: “…I have to consult my notes each time I do my conversions, to keep the differences in format conversion processes straight. If I worked in large volumes, I could see it driving me crazy…

He went on to talking about keeping up with sooo many formats:

…my biggest concern would be how well this tool could adapt to changing format standards (or how they were used by the end-user) over time. And with multiple formats to be concerned about, any little change in one of a half-dozen formats (or how an e-reader reads them) could require major rewriting of the tool.

A suggestion: Another way to look at this might be from the other end of the conversion process, that is, the reader end. As opposed to a universal SW (software) tool that converts and exports from one standard format (say, XHTML) to multiple formats, maybe there should be a set of clear guidelines for the e-reader of whatever HW/SW type to import and convert 1-2 standard formats to their proprietary format. In other words, rules that dictate how the elements in the original standard format must be read on the end-user’s e-reader, and the e-reader itself does the conversion.

The advantage to this plan is that it does not require the SW tool to adjust every time a new e-reader or doc format comes along, which can be costly and logistically challenging for the standards body, at best. Instead, it is up to the e-reader to conform to the guidelines.

This still allows the consumer the ultimate freedom, that is, to decide which e-reader they want to use based on features. And all that your group needs to be concerned about is the standard format, and the conversion guidelines, and you’re done.

Yeah, I know, I quoted a lot, but I liked the way he put his thoughts out there on a multi-format ebooks. To create a one-for-all type of software to convert everything would be a nightmare for programmers, thus it’s better if everyone just came to an agreement on ONE FORMAT.

ePub Conversion Software

So, then I research the MobileRead forum for software that would help you create the epub format that… uh…I didn’t have to buy.

I came to this listings:

  • Calibre
  • eCub
  • ePubHub

Calibre seems to be the most popular. Adobe InDesign can do it too. A list of other software on “How can I create ePub files from my books?” is at LexCycle.

And why was I looking at ePub? I mean, I already sent my books over in the other acceptable formats for the publishers. So, I don’t need to do the ePub thing (which I haven’t); but I really just stumbled into it.

WRITING SOFTWARE

Storyist

Well, I was first looking for that darn software that can convert my book to all the types of format requirements that all the different publishers wanted. I ran across Storyist that has now added the conversion export for the Kindle format. And as I researched if I wanted this thing, and decided I did want it since it looked like it had so many neat features to keep all your data for your research and files that I make when writing a book (like character listing, a location listing with a field to type the description for each place and also helps me to keep track of them), I found it that it’s only on the Macintosh computer! Then I saw StoryMill, but that was another Macintosh software.

Scrivener

Then I found Scrivener, which, at first was another Macintosh software, but now it can also be used in Windows sometime in 2011 (the above link has a beta download). However, Scrivener doesn’t have a timeline feature, but it sure does have some neat corkboard stuff (look at a YouTube video of it). More on Scrivener down below…

Liquid Story Binder XE

However, Liquid Story Binder XE looks pretty good too, but it seems to be a lot more complex, and I’ll get so absorbed with all the features, and not get any writing done.

PageFour

Then there’s PageFour which looks to be simple and something very easy to use; the same as

WriteWay

or WWV), but WriteWay has a few more features. What I really didn’t like is that certain parts of the software isn’t available unless you pay for it. There’s a standard version and a professional version. It’s the only writing software I saw do that. And the price was really up there. It is quite similar to …

WriteItNow

WriteItNow, which doesn’t look as nice as WriteWay , but I loved the idea of the relationship chart.

StoryWeaver

I saw StoryWeaver, but the look just wasn’t there for me (you gottah scroll all the way down to get to see the pictures on the website).

Dramatica Pro

Dramatica Pro just had too much other stuff (mostly on characters and such) than story, and it costs WAY too much on how the screenshots looked (Liquid Story Binder XE “looks” more like a $200.00+ software than Dramatica Pro).

NewNovelist

NewNovelist looked very nice and it reads your story back to you or you can talk you story into it (says the webpage). I remember years ago when the speech stuff was introduced and it wasn’t very good, but like I said, that was over a decade ago. Things might have improved today (which it has…more about that later down the way).

Pricing as of Feb 2011

  • PageFour ($34.95)
  • Liquid Story Binder XE ($45.95)
  • Scrivener ($45.00)
  • WriteWay (Standard $24.00/Professional $49.00)
  • WriteItNow ($59.95)
  • StoryWeaver ($29.95)
  • Dramatica Pro ($209.95)
  • NewNovelist ($49.99)


FREE STUFF

You know me, gottah research to see if there was some free stuff that might be equivalent to what’s on the buying market.

I found a freesoftware called Jer’s Novel Writer Screenshots, but again, it’s for Macintosh .

Another free software is called StoryBook, but it doesn’t seem to have the actual “writing” function. It’s mainly to help you organize. I didn’t see a main workspace for writing your novel. It’s a great tool if you want to keep the writing and the characters/outline separate though. More on StoryBook below…

I found RoughDraft, but it’s not being updated anymore.

And then there was yWriter, which looks really good for a free software. The video in YouTube definitely explained a lot for me on this software. And this YouTube Video was hilarious (Evil Prompts!!) and was so true to what I wanted, and also mentioned yWriter. So…. I downloaded it.

More on yWriter

I went in and put every scene of my book Creations that I’m currently working on into yWriter. I currently only have 11 Chapters and about 2-8 scenes in each chapter–that took me several hours. I didn’t quite know what a “scene” was, but I figured anywhere that I put double paragraph space to represent time passage or a change of scenery or anywhere I put ***, that’s where I had a scene. A very NEAT thing about importing an entire MSWord document into yWriter is that if I had put a *** break throughout my entire document, yWriter would break out every scene automatically for me (I didn’t find out about this until AFTER I inputted everything in manually), and it would beak out the Chapters if it had the word “Chapter 1” for instance in it. If I opened a scene and it had “* * *”, I could choose “Split scene on ‘* * *'” option, and there you go. It makes a new scene from the stars. I didn’t know if it worked since it looked like it blanked my entire scene out, but when I closed the Scene window, it had the next scenes already in the list. You do have to retype the descriptions and titles for each scene though. But, when I copied and pasted my book Creations into it, I had to do all of that anyway.

More on Scrivener

After playing around with yWriter, I decided to give Scrivener a try. Heck, it’s free for right now anyway with the beta testing. I figure I would take a look. I installed it and it told me it would expire in a week, where then I have to go and re-download another beta updated software. That’s cool. I just wanted to take a look.

It mention a tutorial that would take 30-45 minutes. I was like, ok, I had the time for that. Hmmm. This is a Beta, so you can’t expect very much in instructions. I mean, there was no pictures. Written instructions can only do so much with describing what you should click and where you should look. I found myself re-reading instructions 5-6 times before I accidentally found out what it was trying to tell me. Needless-to-say, it took me about two hours to get through. And when I wanted do a “show-and-tell” and tell my husband about the software after I finished it, I forgot most of what I went through.

Back to yWriter

Bottom-line, going through Scrivener made me appreciate yWriter even more. I didn’t really need a tutorial for yWriter. I just jumped right in. If I wanted to find out more, I did a search for it later. Doing Scrivener tutorial also told me how the other software programs I mentioned Above would need a learning curve as well, LOTS of learning, especially Dramatica Pro

I had so much fun with yWriter, I decided to download StoryBook. Well, just like I thought, I couldn’t find, anywhere, where I could actually write my story. I thought I had missed something, but I didn’t think I did. If I did, please let me know, because I didn’t find it anywhere.

However, in yWriter, there is a way to write in a full screen (Just Right-Click inside the Scenes area when you have it opened and select “Full screen text editor”). There’s also a way to make a Scene or Chapter unused simply by Right-Click and select “Toggled Used/Unused”. An Icon will display to state what mode it’s in. You can make something else, other than a “Chapter” and change it to “Other”, which would work great to make a Timeline using the scenes. Hmmm..I think I’ll just make another post just about yWriter. But as you can see, I’ve chose yWriter as my tool of choice! It’s easy, I can jump right into it, it’s free (though I loved it so much, I donated), and it’s simple.

WOW! A long posting today, huh. It took me several days to get this all in and looking at stuff. But it was fun.

Until next time!

Gonna go play with my yWriter 🙂 My Bestist Friend

Took the Plunge…Book Reviews

So, I took the plunge and submitted emails inquiring for books reviews. I dug around and did some research on possible places to submit, and also followed steps from Michael R. Hicks (Author of In Her Name, whose book I really, really enjoyed) as well, on where he was reviewed.

Emailed: Editor@bookloons.com at there BookLoons site
Went to The Book Smugglers and Submitted on their contact page
Emailed: fantasybookcriticblog@gmail.com from their website Fantasy Book Critic without being able to find the Review Policy, gulp, so I hoped they don’t get offended

And I got one response back from BookLoons who politely stated “I don’t have a reviewer for these but do wish you every success.” I thought that was very nice. Especially to take the time to write back and wish me the best. I love those types of rejection. It keeps me encouraged that I can at least get someones time to respond back, and that good enough for me.

I’ll continue on with researching on how to market my book. Maybe look into how to make a online book tour. 🙂

Until next time…

More on Lightning Source and PDF/X-1a:2001

It’s cool that I got some comments regarding all the troubles I had with the PDF/X-1a:2001 format. And the bottom line is…. Gottah buy the software to make it easier on ya!

I know that’s not what I would want to hear either (I said this before), but that’s what you’ll have to do if you want this format. But also remember that the Book Cover just has to be in High Quality. The text, or interior, has to be PDF/X-1a:2001. THOUGH…as I stated before, I have pictures in my interior and it wasn’t meeting the PDF/X-1a:2001 validation, and it went through all the same.

So if you already have pdf files, you can try to send them through and see what happens. Let me know how it goes!!

Writing!

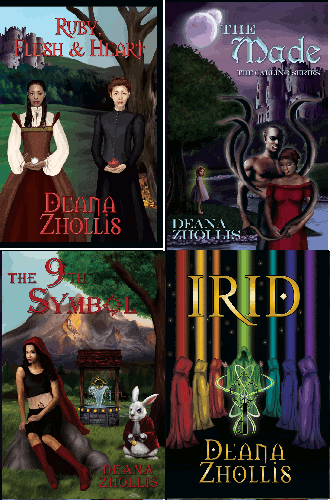
I got some writing in this past weekend. It felt pretty good! I hadn’t sat down to write since January. And now I’m stuck! Don’t you just hate it when you sit down and write and things change and turn different than what you previously had thought in your head? That’s what happened with my book Creations. It’s the 3rd book of The Calling Series. Book 1 and Book 2 are already written, though only Book 1 is published (The Made). Book 2 is already written, I just need to get that edited, which I intend on doing along with The 9th Symbol, which is not part of the Calling Series–it’s a standalone. Book 4 of the Calling Series is still in the noggin, though I’m writing down notes as I go along with Book 3. Book 4 would be the last of the Calling Series, and I’ve titled it Nostrum.

Thank goodness for buying 10 ISBNs. I’ve got them all used up except one (1)!

I’m on Barnes & Noble, Inc !!

And so it begins!

Yep. I periodically do a search for “Zhollis” in google and also look at other book selling sites to see if my books made it there, and so it has. I’m on Barnes & Noble, Inc!!! It feels pretty good to be somewhere else besides Amazon. I’m not putting down Amazon at all it just that I like to see myself on other sites as well. And that’s what Lightning Source does for ya.

I don’t see Borders picking up any of my titles yet, but I’ll keep checking. Thanks to Mobipocket, I do see my books in several eBook selling sights. Unfortunately, Mobipocket isn’t taking any new authors anymore, but there’s still Amazon and their very popular Kindle that appears to bring back a readership again. And this is great for us writers :). I saw on a Tyra show (not that I watch that show, it just happened to be on. I don’t watch much TV. I’m a website viewer junkie) that Halle Berry loves her Kindle because she can jump around and read like 30 different books at a time, and she didn’t consider herself a book reader. But hey!, if more people are into eBooks and reading, all the better, I say!

That’s all I have to report thus far on my progress. I’m been busy raising the kid (6 months now) and have limited time on my other stuff, so the weekend is basically the only time I can get some “me stuff” in.

Until next time 🙂

Lightning Source, Gimp and PDF/X-1a:2001…NightMare!!!

nightmareOkay, so this was a NIGHTMARE!! I tried everything to finding out how I can change my pdf files to Lightning Source’s PDF/X-1a:2001. I thought I could figure out how to change it and write up a nice step-by-step on using free software to do it.
But Noooooo!!!!

Bottom line: You REALLY need to purchase Adobe Professional version 6 or higher…

(UPDATE JULY 30, 2011: A commenter suggested Serif Page Plus X5. which is So, so, so, so much cheaper than Adobe. You should check that out!
UPDATE OCTOBER 7, 2012: I would recommend Lightning Source ONLY if you have a good following of fans. Otherwise, try CreateSpace’s Expanded Distribution instead, which is much cheaper and less of a hassle for us just starting out).

I know that’s not something you wanted to hear, and I hate searching the web trying to find something and keep hearing something that I CAN’T do, but that’s the conclusion that I’ve come to.

If you know of a way…PLEEEEAAAASEEEE LET ME KNOW!!!

The thing is, there are different types of PDF files and basically “a pdf is just not a pdf”. There’s that PDF/X-1a:2001 which basically has a lot of restrictions or rules on how it’s created.

For example: All fonts must be embedded into the file so that anyone can read the pdf with the font you intend for it to have. And then there’s the color rule where it has be CMYK and it also can not have Encryption.

So the Adobe Distiller, that comes with Adobe Professional, can make this happen.

I tried very hard to use the downloaded cutePDF, which is a free pdf converter, but it didn’t have the parameters for the PDF/X-1a:2001 format, and it always left a white space when I print my picture file to it. It doesn’t size your book. My Photo Printing Wizard would come up and it would always print to a 8×11 piece of paper.

But what I did find out was that the Book Cover can be in High Quality for Lightning Source instead of PDF/X-1a:2001. But the Interior HAS to be in PDF/X-1a:2001 format.

I had problems with my Book Cover in converting my files to PDF/X-1a:2001 after installing the Lightning Source templates to match the Full Book Cover parameters that they must have. But I had no problem with High Quality.

Needless to say that used LuLu first to print out my books to see how they are going to look. Because? Well, I read up somewhere that LuLu uses the same printer as Lightning Source or uses Lightning Source as it’s printer (one of those…so the Net says). So for my two books, it costed me $27.00 to print me a proof (including shipping) versus Lightning Source, which is going to be $30.00 per book.

I also went back to my Book Cover designer who did change my Book Covers to be PDF/X-1a:2001 compliant. Bottom line, find someone who can convert it for you. But like I said, I believe the covers can also just be High Quality.

I haven’t OFFICIALLY sent the files to Lightning Source yet, so I might have to come back and edit some things, but this is what I’ve done so far before going to them. Currently, I’m waiting for my 2nd batch of books using the files that my Book Cover designer created for me to see how they look.

MY STEPS FOR LIGHTNING SOURCE COMPLIANCE USING GIMP – HIGH QUALITY
I have Adobe Acrobate Professional 6.0, but I’m not familiar with it very much on editing pictures and files and stuff. So I use Gimp. You can use that site to download it. I also downloaded GhostScript so that I can read esp and pdf files. Lightning Source only gives these two types of files as templates that I could actually use (the other two are for Mac users, I think). I downloaded the ESP file template from Lightning Source. See steps below on how to install the GhostScript for Gimp to see esp and pdf files.

Here’s a list of files that I’ve downloaded.

Quick NOTE: You can download CutePDF and Gimp at the same time from NiNite if you want to still try to get it to work, but I suggest going the doPDF route (another freeware) because it embeds and also sizes. Only use this route and go to CreateSpace as your printer. For Lightning Source…you have to have Adobe Professional version 6 or higher.

GhostScript for the gs870w32.exe OR USE GhostScript file
Lightning Source MSWord Walkthrough

If that Link for Lightning Source doesn’t work, go to Lightning Source, and click File Creation > Digital BookBlock Creation (Standard Books) and then scroll down to Section three (3) with the title “Create a Postscript file from your custom template” and click Microsoft Word

How to Install GhostScript

1. First, download the latest version at GhostScript or GhostScript file
2. Open GhostScript installer and follow the instruction.
3. You need to set an environment variable GS_PROG to point to gswin32c.exe (This simply means that you need to have Gimp know where Ghostscrip is and any other software will know where it is too.
• Go to Control Panel–>System–>Advance OR Right-Click My Computer– Properties> Click Advance tab
• Click On the Environment Variables button.
• You have two windows: 1) for User Variable and 2) for System variables.
Choose User and Click the NEW button next to that window.
• For Variable Name type: GS_PROG
• FOR variables value: point to gswin32c.exe, in my case it was located at (C:Program filesGhostscriptgs8.70bingswin32c.exe). You can go to START > PROGRMA > GIMP and Right-Click, then
select Properties and in the Target field, copy the string without the quotation marks.

And that’s it. You’re done! Now your Gimp can open eps files as well as pdf files.

BOOK COVER: EDITING YOUR LIGHTNING SOURCE ESP FILE USING GIMP

This section shows my steps on editting the Lighting Source ESP file for a 6×9 Book Cover
What you will need:
*~* Your Back, Front and Spine picture files
*~* Gimp
*~* Acrobate Distiller 6.0 version or Higher
*~* Your ISBN number of your book
*~* Lighting Source ESP file from Lightning Source templates
To create this template you will need your ISBN number of your book and your book’s pages must be able to be divided by two(2)…meaning, it has to be an even number. My book had 203 pages, so I did a Page Break at the end of my book to make an extra page.

1) Got to File > Open and find your ESP file and click OPEN
2) Change Resolution to 300
3) Click Import
4) In Gimp, Make sure your Layers window is open, if not, go to Windoes >Dockable Dialogs > Layers
5) Go to File > Save As > Select File Type and choose GIMP XCF Image (the new file with have the .xcf extension). Click Save
6) Press Rectangular Selector Tool icon, located in the Toolbox window
7) Go to File > Open as Layer
8 ) Find the picture of the Back Cover of your book (Mine are .jpg)
9) Press the Move Icon and move image to LEFT side
10) Click Scale Tool and select image
11) Change Image to: width 1728 and Height 2634 (pixcels)
12) Press the Move Icon and move image within PINK border
13) Repeat steps 6-12 for Front Cover image file but move image to RIGHT side
14) Repeat steps 6-12 for Spine but change image Scale size to width 108 and Height 2628 (The spine width on the ESP template is in inches, so use the inches in GIMP which would be width .0360 and Height 8.760). Make sure to save as you go
15) In the Layers window, Right-Click Page 1 and click Duplicate Layer. Save
16) In the Layers window, Check off the EYE/LOOK icon on all images in the LAYERS window except Page 1 copy
17) Click the Rectangular Selector Tool icon and draw a box around the the ISBN bar
18) Go to Edit > Copy Visible
19) Go to Edit > Paste As > New Layer
20) Click the Move Icon and Move ISBN bar to the location you need it
21) Click the EYE/LOOK icon of the Back Cover image to see how the ISBN looks with it on. You might have to Move that layer up or down (select, hold, and drage) in the Layers Window to have the ISBN bar on top of the Back Cover layer
22) Save
23) Take off the EYE/LOOK icon for the Back Cover and ISBN layer. Only Page 1 copy should have an eye. Make sure the Page 1 copy layer is highlighted
24) Click the Rectangular Selector Tool icon and hightlight the complete book area using the BLUE border as a guide. Basically select over the Blue Border to the RIGHT edge of the image
WARNING!! MAKE SURE THE THERE IS NOTHING ELSE HIGHLIGHTED WHEN YOU USE THE SELECT
OR ELSE YOU WILL FILL IN THOSE HIGHLIGHED WITH A COLOR. To turn off the highlight of another layer, go to that layer and click SELECT > NONE. Or click anywhere else outside
the image on that layer page.
25) Go to VIEW > Show layer boundary and make sure there isn’t a checkED mark
26) Click the Bucket FIll Tool, cLICK Fill Whole Selection and then click the
FRONTGROUND square to fill the background with the color you want (Black or White).
WARNING!! Only do this if that’s the background of your book. Otherwise you’ll have a BIG BLACK border around the image of your front and back cover. I found this out after receiving my book from LuLu.
27) While Image is still selected, go to EDIT > COPY VISIBLE
28) Go to LAYER > NEW LAYER and name it Black Background (or White Background)
29) Take off the EYE/LOOK icon for Page 1 copy
30) Go to EDIT > PASTE INTO
31) Go to SELECT > None and also Click Rectangular Selector Tool icon and click outside the image to remove selection
32) SAVE
33) Delete the Layers with the Template image on it (Page 1 and Page 1 Copy) by going to the Layers Widnow, Right-Click the layer and choose Delete Layer. Save
34) Turn on the EYE/LOOK icon for all images for the Full Book Cover
35) Click Rectangular Selector Tool icon and Select the Entire Book Cover so that everything is
selected except for the checker piece background.
36) Go To IMAGE > FIT CANVAS TO SELECTION. Make sure there isn’t any canvas/checks. User the VIew >
Zoom > 1:1 (100%) if need be to make sure. Then zoom back to 1:1 (25%). Save.
37) Go to File > Save as jpg. Click Save. Click Export.
38) Got to Image > Scale Image. Change to inches and make note of the Image size (Width and Height).
Then click CANCEL
39) Go to File > Save as PostScript document (PS). Click Save. Click Export. Change the Xoffset and
Yoffset to Zero. Use PostScript Level 2
40) Go to File > Close
41) Open Acrobat Distiller and Change Default Settings to High Quality
42) In Acrobat Distiller, Go to Settings > Edit Adobe PDF Settings and on the General tab, Change
Width and Height to match image size you jotted down.
43) Click Save As button and save file as High Quality(LsI).joboptions
44) In Acrobat Distiller, Go to File > Open and select the PS file you created from Gimp. This
changes the file from PS to PDF.

Whew! You’re DONE! I hope this helps or at least gets you started pointing in the right directions.

For the interior of your Book, check out my How to format your Book with MSWord blog post.