Stupid Comments Mistakeningly Blocked!! Improved for 2010 :)

So, This ENTIRE time, I just thought people weren’t visiting my blog, and I was just posting away on my monthly way thinking that maybe later on I would start getting some visits. Well someone emailed me after I posted my Lightning Source PDF horror (he took that extra little step to go to my book website and used my Contact Page), and told me that he couldn’t leave a comment. I was like, “What?” So, sure enough, there was this stupid error talking about cookies and java scripts and such. If I got that error after writing a comment, I was just leave too and wouldn’t be bother with it. Who wants to bother with fixing your cookies and java stuff. Well it took me a few hours and I figure out that one of my plug-ins was being blocked by .htaccess, which I had used for additional security.

DUH!!

I was wondering why my Counter plug-in never worked either. Well, needless to say, I think I solved my problem…I think. 🙂 We’ll see if this fixes things and I may see some responses in the year 2010.

Hopefully this doesn’t open up that onslaught of SPAM that I was trying to prevent.

The things your learn as you go.

Until Next time! 🙂

Lightning Source, Gimp and PDF/X-1a:2001…NightMare!!! 32

nightmareOkay, so this was a NIGHTMARE!! I tried everything to finding out how I can change my pdf files to Lightning Source’s PDF/X-1a:2001. I thought I could figure out how to change it and write up a nice step-by-step on using free software to do it.
But Noooooo!!!!

Bottom line: You REALLY need to purchase Adobe Professional version 6 or higher…

(UPDATE JULY 30, 2011: A commenter suggested Serif Page Plus X5. which is So, so, so, so much cheaper than Adobe. You should check that out!
UPDATE OCTOBER 7, 2012: I would recommend Lightning Source ONLY if you have a good following of fans. Otherwise, try CreateSpace’s Expanded Distribution instead, which is much cheaper and less of a hassle for us just starting out).

I know that’s not something you wanted to hear, and I hate searching the web trying to find something and keep hearing something that I CAN’T do, but that’s the conclusion that I’ve come to.

If you know of a way…PLEEEEAAAASEEEE LET ME KNOW!!!

The thing is, there are different types of PDF files and basically “a pdf is just not a pdf”. There’s that PDF/X-1a:2001 which basically has a lot of restrictions or rules on how it’s created.

For example: All fonts must be embedded into the file so that anyone can read the pdf with the font you intend for it to have. And then there’s the color rule where it has be CMYK and it also can not have Encryption.

So the Adobe Distiller, that comes with Adobe Professional, can make this happen.

I tried very hard to use the downloaded cutePDF, which is a free pdf converter, but it didn’t have the parameters for the PDF/X-1a:2001 format, and it always left a white space when I print my picture file to it. It doesn’t size your book. My Photo Printing Wizard would come up and it would always print to a 8×11 piece of paper.

But what I did find out was that the Book Cover can be in High Quality for Lightning Source instead of PDF/X-1a:2001. But the Interior HAS to be in PDF/X-1a:2001 format.

I had problems with my Book Cover in converting my files to PDF/X-1a:2001 after installing the Lightning Source templates to match the Full Book Cover parameters that they must have. But I had no problem with High Quality.

Needless to say that used LuLu first to print out my books to see how they are going to look. Because? Well, I read up somewhere that LuLu uses the same printer as Lightning Source or uses Lightning Source as it’s printer (one of those…so the Net says). So for my two books, it costed me $27.00 to print me a proof (including shipping) versus Lightning Source, which is going to be $30.00 per book.

I also went back to my Book Cover designer who did change my Book Covers to be PDF/X-1a:2001 compliant. Bottom line, find someone who can convert it for you. But like I said, I believe the covers can also just be High Quality.

I haven’t OFFICIALLY sent the files to Lightning Source yet, so I might have to come back and edit some things, but this is what I’ve done so far before going to them. Currently, I’m waiting for my 2nd batch of books using the files that my Book Cover designer created for me to see how they look.

MY STEPS FOR LIGHTNING SOURCE COMPLIANCE USING GIMP – HIGH QUALITY
I have Adobe Acrobate Professional 6.0, but I’m not familiar with it very much on editing pictures and files and stuff. So I use Gimp. You can use that site to download it. I also downloaded GhostScript so that I can read esp and pdf files. Lightning Source only gives these two types of files as templates that I could actually use (the other two are for Mac users, I think). I downloaded the ESP file template from Lightning Source. See steps below on how to install the GhostScript for Gimp to see esp and pdf files.

Here’s a list of files that I’ve downloaded.

Quick NOTE: You can download CutePDF and Gimp at the same time from NiNite if you want to still try to get it to work, but I suggest going the doPDF route (another freeware) because it embeds and also sizes. Only use this route and go to CreateSpace as your printer. For Lightning Source…you have to have Adobe Professional version 6 or higher.

GhostScript for the gs870w32.exe OR USE GhostScript file
Lightning Source MSWord Walkthrough

If that Link for Lightning Source doesn’t work, go to Lightning Source, and click File Creation > Digital BookBlock Creation (Standard Books) and then scroll down to Section three (3) with the title “Create a Postscript file from your custom template” and click Microsoft Word

How to Install GhostScript

1. First, download the latest version at GhostScript or GhostScript file
2. Open GhostScript installer and follow the instruction.
3. You need to set an environment variable GS_PROG to point to gswin32c.exe (This simply means that you need to have Gimp know where Ghostscrip is and any other software will know where it is too.
• Go to Control Panel–>System–>Advance OR Right-Click My Computer– Properties> Click Advance tab
• Click On the Environment Variables button.
• You have two windows: 1) for User Variable and 2) for System variables.
Choose User and Click the NEW button next to that window.
• For Variable Name type: GS_PROG
• FOR variables value: point to gswin32c.exe, in my case it was located at (C:Program filesGhostscriptgs8.70bingswin32c.exe). You can go to START > PROGRMA > GIMP and Right-Click, then
select Properties and in the Target field, copy the string without the quotation marks.

And that’s it. You’re done! Now your Gimp can open eps files as well as pdf files.

BOOK COVER: EDITING YOUR LIGHTNING SOURCE ESP FILE USING GIMP

This section shows my steps on editting the Lighting Source ESP file for a 6×9 Book Cover
What you will need:
*~* Your Back, Front and Spine picture files
*~* Gimp
*~* Acrobate Distiller 6.0 version or Higher
*~* Your ISBN number of your book
*~* Lighting Source ESP file from Lightning Source templates
To create this template you will need your ISBN number of your book and your book’s pages must be able to be divided by two(2)…meaning, it has to be an even number. My book had 203 pages, so I did a Page Break at the end of my book to make an extra page.

1) Got to File > Open and find your ESP file and click OPEN
2) Change Resolution to 300
3) Click Import
4) In Gimp, Make sure your Layers window is open, if not, go to Windoes >Dockable Dialogs > Layers
5) Go to File > Save As > Select File Type and choose GIMP XCF Image (the new file with have the .xcf extension). Click Save
6) Press Rectangular Selector Tool icon, located in the Toolbox window
7) Go to File > Open as Layer
8 ) Find the picture of the Back Cover of your book (Mine are .jpg)
9) Press the Move Icon and move image to LEFT side
10) Click Scale Tool and select image
11) Change Image to: width 1728 and Height 2634 (pixcels)
12) Press the Move Icon and move image within PINK border
13) Repeat steps 6-12 for Front Cover image file but move image to RIGHT side
14) Repeat steps 6-12 for Spine but change image Scale size to width 108 and Height 2628 (The spine width on the ESP template is in inches, so use the inches in GIMP which would be width .0360 and Height 8.760). Make sure to save as you go
15) In the Layers window, Right-Click Page 1 and click Duplicate Layer. Save
16) In the Layers window, Check off the EYE/LOOK icon on all images in the LAYERS window except Page 1 copy
17) Click the Rectangular Selector Tool icon and draw a box around the the ISBN bar
18) Go to Edit > Copy Visible
19) Go to Edit > Paste As > New Layer
20) Click the Move Icon and Move ISBN bar to the location you need it
21) Click the EYE/LOOK icon of the Back Cover image to see how the ISBN looks with it on. You might have to Move that layer up or down (select, hold, and drage) in the Layers Window to have the ISBN bar on top of the Back Cover layer
22) Save
23) Take off the EYE/LOOK icon for the Back Cover and ISBN layer. Only Page 1 copy should have an eye. Make sure the Page 1 copy layer is highlighted
24) Click the Rectangular Selector Tool icon and hightlight the complete book area using the BLUE border as a guide. Basically select over the Blue Border to the RIGHT edge of the image
WARNING!! MAKE SURE THE THERE IS NOTHING ELSE HIGHLIGHTED WHEN YOU USE THE SELECT
OR ELSE YOU WILL FILL IN THOSE HIGHLIGHED WITH A COLOR. To turn off the highlight of another layer, go to that layer and click SELECT > NONE. Or click anywhere else outside
the image on that layer page.
25) Go to VIEW > Show layer boundary and make sure there isn’t a checkED mark
26) Click the Bucket FIll Tool, cLICK Fill Whole Selection and then click the
FRONTGROUND square to fill the background with the color you want (Black or White).
WARNING!! Only do this if that’s the background of your book. Otherwise you’ll have a BIG BLACK border around the image of your front and back cover. I found this out after receiving my book from LuLu.
27) While Image is still selected, go to EDIT > COPY VISIBLE
28) Go to LAYER > NEW LAYER and name it Black Background (or White Background)
29) Take off the EYE/LOOK icon for Page 1 copy
30) Go to EDIT > PASTE INTO
31) Go to SELECT > None and also Click Rectangular Selector Tool icon and click outside the image to remove selection
32) SAVE
33) Delete the Layers with the Template image on it (Page 1 and Page 1 Copy) by going to the Layers Widnow, Right-Click the layer and choose Delete Layer. Save
34) Turn on the EYE/LOOK icon for all images for the Full Book Cover
35) Click Rectangular Selector Tool icon and Select the Entire Book Cover so that everything is
selected except for the checker piece background.
36) Go To IMAGE > FIT CANVAS TO SELECTION. Make sure there isn’t any canvas/checks. User the VIew >
Zoom > 1:1 (100%) if need be to make sure. Then zoom back to 1:1 (25%). Save.
37) Go to File > Save as jpg. Click Save. Click Export.
38) Got to Image > Scale Image. Change to inches and make note of the Image size (Width and Height).
Then click CANCEL
39) Go to File > Save as PostScript document (PS). Click Save. Click Export. Change the Xoffset and
Yoffset to Zero. Use PostScript Level 2
40) Go to File > Close
41) Open Acrobat Distiller and Change Default Settings to High Quality
42) In Acrobat Distiller, Go to Settings > Edit Adobe PDF Settings and on the General tab, Change
Width and Height to match image size you jotted down.
43) Click Save As button and save file as High Quality(LsI).joboptions
44) In Acrobat Distiller, Go to File > Open and select the PS file you created from Gimp. This
changes the file from PS to PDF.

Whew! You’re DONE! I hope this helps or at least gets you started pointing in the right directions.

For the interior of your Book, check out my How to format your Book with MSWord blog post.

Amazon, Mobipocket…and Nursing?

MY THREE BOOKS ARE UP AND RUNNING!!

Between nursing and diaper changes, I finally got three books ready to sell on Amazon.com and Mobipocket. The 2nd and 3rd books didn’t take very long at all to get on Amazon and Mobipocket; so I guess that once you have one (1) book up and going, everything else takes less than five (5) days. I uploaded my books on a Monday and it was on Amazon by Friday.

HURRAY!!!! Irid and Ruby, Flesh & Heart are on the move!!

So now for the next step–Marketing Online.

I’ve been doing some research and I’ve decided to do New Press Releases at prlog.org and prweb.com. I’m not quite sure how they work, but I figure I would write up a press release and post them anyway. There’s also my college alumni magazine I can post into as well. I’ve already stated my progress on my Facebook as well. I’m sure there’s more out there to do and I’ll research on how to do it. I did take a business course on online businesses, so I’ll go back through my notes on that as well to see the other advertisements I can do.

I’ve added meta tags to my webpage. Meta tags are information inserted in the heading of a web page to tell a browser what your page is all about. It’s more html stuff I learned about in my online business class. Not sure it will help, but decided to see what will happen anyway.

So, once I’ve done with my research on every possible way I can market online, I’ll be posting it here.

And darn! I missed another month (September). I tell ya. Being a parent ain’t no joke. I just don’t have as much time as I use to, to do things. I can see the fun and the not so fun of being a parent, but I’m definitely going to find the time to do what I have always dreamed of doing.

Well…back to nursing. Until next time!!

CreateSpace — Proofs and Posts and Parenthood

Soooooo…. I have to buy my proof everytime I update the pdf file to the website on CreateSpace. Oh well. So far I’ve ordered 3 copies of Irid and 1 copy of Ruby, Flesh & Heart. And hopefully, I only have to order one copy each on my next round. Whenever I get to that…

I thought I posted something in July…oh well. Guess I didn’t. Being that it was my last month with my daughter in my belly, I must have missed it. Also, being that August is the first month of my daughter’s life, I haven’t been able to look at all the proofs I’ve ordered. So, it will be awhile before I can get a final result for my books and get them on Amazon. Such is life.

And as I type…I hear the baby crying (Thank Goodness for my Hubby!!). Parenthood…they say to enjoy everything and that time goes by so fast. But right now, with lack of sleep, nursing every 2-4 hours, barely able to eat and look decent (yep, I look like a hobo Mom right now), time seems to be going so, so, so, so, slow.

Here’s to my adventure into PARENTHOOD!! I can now see why, so far, you want to pull out your hair one minute and can’t help smiling at your offspring the next.

When I can get my time to myself, I’ll be able to get these books going. Here’s to next time…and hopefully soon if not sometime in September.

The Book Cover for Ruby, Flesh & Heart is HERE!!

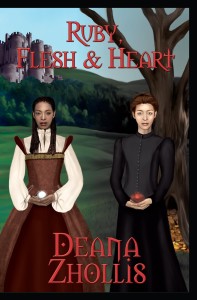
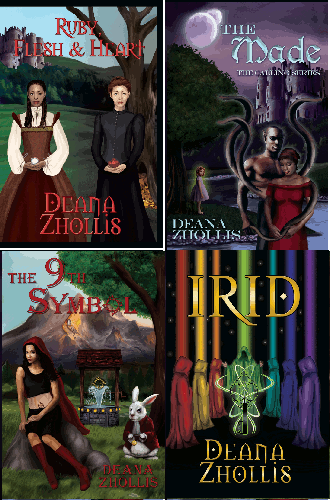
So, here’s Ruby, Flesh & Heart’s book cover.

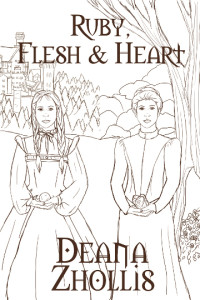
Here’s the first sketch for the cover. I wanted the braids to be individually platted, and the faces to look a more different.

Ruby 1st Sketch

Ruby 1st Sketch

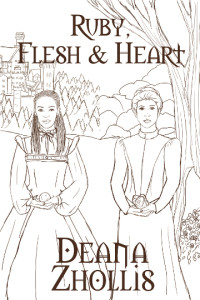
The second sketch had the suggested changes, and then we went to color.

Ruby 2nd Sketch

Ruby 2nd Sketch

I had NO problems with the color at all! So it was a thumbs up for me!

Ruby Final Color

Ruby Final Color

And that’s it. My Book Cover Designer is AWESOME!

See the previous post for Irid’s Book Cover design steps.
See the future post for The 9th Symbol steps.

The Book Cover for IRID is here!

Hurray! I guess going at this a 2nd time around is not as bad as the first. Time seems to fly by fast!
The only thing was I didn’t get my summary edited so I had a different editor work on that, just trying him out. But my designer was going on vacation in July so I had to just send what the new editor had, hoping it was good enough. If not, then I asked for a black back cover for my book, and I can add in the text myself. My Book Cover Designer was so helpful in that arena. She didn’t have to do that for me (she actually suggested blank since I wasn’t ready for my text yet, so I asked for both). I’m just placing the front cover of the book on here.

So here are the stages for my Irid Book.

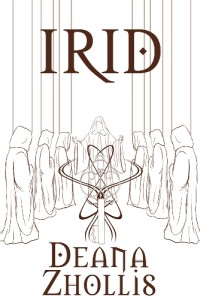
Here’s the first draft, and I had NO problems with what I saw. It looked great!

Irid Sketch

Irid Sketch

Here’s the first color and my husband said it was bland somewhere and suggested to add stars. It was a great idea! See results of that small difference below. Also, the key had to be green instead of gold.

Irid First Color

Irid First Color

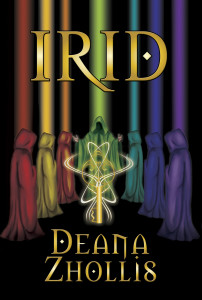
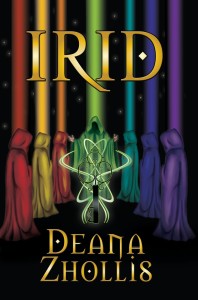
Here’s the final color. I had NO problems with what I saw, so I said YES!

irid_front_small

That’s about it for Irid. Next post is the book cover for Ruby, Flesh and Heart!

See the previous post for The Made Cover design steps.
See future post for Ruby, Flesh and Heart Cover design steps.
See the future post for The 9th Symbol steps.

Publishing Two More Books Adventures…and the future

Hurray! I’m back on for Round 2 for my Books Irid and Ruby, Flesh and Heart.

The book covers are coming along FABULOUSLY, and I’ll put up the beginning and end process/pictures on my next post.

Also, I posted for a new Editor on Guru, and my old Editor saw it and said she was available. So yeah, I want to re-work with her! I had mentioned it to her before, but I wasn’t ready yet since I had to build up on the funds again. So, I just approved the projects to her and off we go!

I forgot about editing my bookcovers and the summary for those, so I re-posted for this other editor to take a look at it. I had liked his profile before my previous editor saw my posting, and he had a nice price, so I wanted to see how he looks at things. Next, I’ll have to contact my Illustrator and let her know that I forgot to get the back edited…duh! She had already done the color for Irid and it looks great! I had a few suggestions on what I wanted to add, so I’m excited about seeing how it will come out. I’ve seen the first draft for Ruby, Flesh and Heart and it looks great! I told my Illustrator that her work was BAD ASS!

My next two more books that are complete that I will need to do are: The 9th Symbol and Jetta. I’ll have to save up again after the current two projects are done, and the next thing would be to get back to writing on all the projects I’ve started but haven’t finished yet: Creations (3rd book Series in The Calling), Death First Rose, Feral Dance, and Elements. I also have the final and last book of The Calling Series that’s in my head that I haven’t even began on.

So, lots to do! Lots to do!

I’m hoping I can do all of this still, because back in December 2008, I found out that miraculously I’m pregnant! Being 37, I had given up on that dream 10+ years ago. I re-married in July 2008, and 4 months later, WHAM! I’m knocked up! 🙂 Funny how life has its way of letting you know when the “right time” is. When I was 12, and even when I was in college, I had stuff all planned out, but life is strange that way. What I had planned and what was actually SUPPOSED to happen was all on a different timeline. But I’m not complaining, not in one least bit. This IS the right time.

I have money, a house, a good husband, and a flexible job where all of my dreams can now come true.

Now to figure out how to change diapers…. Hmmmm….

Goldilocks Issues: Word Press Blog Header Update & Business Cards

BUSINESS CARDS
I went to VistaPrint and made some business cards and some postcards with the image of my book cover on it. It came out very, very well. I like them. I put an image of me on the back of the business card with the words “Thank You.” I saw that on one of my husband’s old business cards, and I thought that was a pretty nice idea.

I got the postcards so I can sign them and send them out to relatives who want me to sign their books, but they live in different states. It just costs a lot to ship books back and forth; so my mom suggested this idea where I can write a nice thingy on a postcard, mail that out, and then whenever I actually see my relative, I’ll sign the book. They can place the postcard in the book in the mean time.

WORD PRESS HEADER

Man! That took forever to just change the header for my blogsite!

STEP 1:
First I tried to make some kind of background image to lay (or is it lie) my book cover on. I took parts of the book’s cover and kept copy/pasting it over and over using the program PAINT (standard in MicroSoft).

I look at several ways of doing this backdrop.

1) I tried recreating the sky, but it just look like plaid.
madebackground

2) Then I tried to just do simply stars that looked random. It was o…k….

madebackgroundstar2

3) Then I just went for plain, but it was just not the right background…
madebackgroundplain2

So none of them would do (I sound like Goldilocks and the Three Bears. LOL!!) None of them looked right with the book cover. So I decided just have plain ole Black.

STEP 2:
So then I went to WordPress on how to update the default theme and its header. Not easy for me at all. I tried replacing the image “kubrickheader.jpg” with my image, but first you had to upload your image. And where might that be? I had no idea. So, I decided to upload it to my Folder: wordpresswp-contentthemesdefault. And I used my Dreamweaver to upload just that file. Well that got it working, but it still had the stupid blue background because my image, I guess, wasn’t big enough. At least I got the “display:none;” to work to get the Title and Subtitle out of the image.

Here’s where I put it in Word Press APPEARANCE > EDITOR > STYLESHEETS CSS.
@@@@@@@@@@@@@@@@@@@@@@@@@@@
@ h1 {display:none;
@@ font-size: 4em;
@@ text-align: center;
@@ }
@@
@@
@@
@@ Headerimg .description {display:none;
@@ font-size: 1.2em;
@@ text-align: center;
@@ }
@@@@@@@@@@@@@@@@@@@@@@@@@@@

STEP 3:
But I still couldn’t get that darn blue area out of the way. So I went back to my metamorph_tropicforest theme, took a look at it and decided to change the “header.jpg” name to an image I just created with PAINT.
I renamed the orginal “header.jpg” to STEP 4:
So THEN I had to resize my “header.jpg” to be exactly 791 X 182. I used PAINT using IMAGE >ATTRIBUTES and resized a blank canvas, and then pasted my book cover, which expanded the length, but not the width. I just grabbed a side of my book cover image and on the PAINT bottom corner, it tells you, while you resizing, what size it’s making it. So I made sure it was 182 and then squeezed it to coordinate the image so that it wouldn’t look so stretchy.

FINALLY DONE:
So I uploaded the images and it looks okay. My book cover looks pretty small, but it’s up there. Resizing the images to match existing images that was use in the theme, was much easier than trying to figure out the default theme for me. I had to re-edit the metamorph_tropicforest Stylesheet to take out the title and subtitle that was going over my header like this..
@@@@@@@@@@@@@@@@@@@@@@@@@@@
@@ }
@@ #logo a {display:none;
@@ text-decoration: none;
@@ text-transform: lowercase;
@@ font-style: italic;
@@ font-size: 18px;
@@ color: #ffffff;
@@ }
@@ #logo H2
@@ {display:none;
@@ font-size: 12px;
@@ color: #ffffff;
@@ }
@@@@@@@@@@@@@@@@@@@@@@@@@@@

So there you have it! I’m done. So, yeah, the book cover is too small, and I couldn’t get it “Just Right” like Goldilocks, but it will do.

Till Next time!!

Book Cover Quotes In! and More Guru for new Editor

I got my quotes back on my book covers, and I’m so glad it’s within the budget.

HURRAY!

So now I need to get an editor (or two) for the next two books: 1) Iridand 2) Ruby, Flesh & Heart. I’m going back to Guru to find another editor since the editor for my first book didn’t respond to my inquiries of continuing a relationship with my other four (4) books that I need edited. So, I’m back to the drawing board and finding another one.

It was a bit overwhelming using Guru the first time and some people can just be all out rude on that site. I understand that people have been mislead and projects not paid, but try to use some common sense or inquiries on the customer before you make judgements. My goodness! So, I’m not looking forward to trying to find another editor on the site. Prices and ranges are out there for my budget, but I’m hoping my word count for these next two books might be a little bit less expensive. Irid and Ruby, Flesh & Heart both have 75,000 words, which makes a total of 150,000 words. That is more words, put together, than my first book which had 130,000 words. But since it’s two books, I’ll be getting more done. We’ll see how much they will amount to.

I decided to put both projects in separately, which might bring the cost down…not sure. It will probably be up. Or may just be the same. I’m not sure if I want to work with two different editors on two different projects. The styles might be different. But then again, I might just find one and ask if they can do the other as well. We’ll see how it goes.

I looked into eLance as well and Googled about the two sites. I just basically got the idea that they were pretty much the same, but for those look to make money, eLance was more expensive, yet better quality of customers, than Guru. I didn’t see much on what customers have to say about the two sites, besides the freelancers saying that customers have posted the same projected on both sites sometimes. So I guess I’ll stick with Guru since that’s where I found two very good freelancers: my editor and my book cover illustrator.

Wish me luck!

New BookCovers!

I’ve been debating on my next step, and of course, Lightning Source has been pushed to the side yet again.
Finally! I got my idea!

idea

TA-DAH!!! I’ve decided to do two more books covers for the money I’ve been saving up since November 2008. I’ve sent in my suggestions for the look I envisioned for each book cover, and I’m now waiting on my designer to get back with me on the quotes. I’m hoping it’s not too much. ::gulp:: Since getting my books edited costs more, I figured I’d get the designs done first and put that on my website to make it look even more professional.

I chose to do two books that are not part of The Calling Series: 1) Iridand 2) Ruby, Flesh & Heart. Those two are my fun books (the one’s I enjoyed writing the most), and I’ll get to the series a bit later–after these two, I’ll go back to the series and work on Jetta next. Besides, the 3rd and 4th books of the series aren’t even completed, and the 4th book hasn’t even been started on….but it’s right here in the noggin.

Since I haven’t been doing much on advertising, my book hasn’t sold on MobiPocket since I’ve put it up there Jan 2009. And Amazon doesn’t show any ranking either of course (that should be under Product Detail), though I did see that the Kindle version is out there but shows “Not Yet Available.” Hmmm. Don’t know what that means. Plus the Kindle version is titled “The Made” and not “The Made: The Calling Series” like the paperback. Don’t know how that happened either. Must be something to do with how CreateSpace and MobiPocket put it up there. Who knows. I’m just glad it’s there. Next time I’ll be a bit more specific with my titles names when I use Mobipocket. I kept changing them around because I didn’t like the format of the html file I uploaded (You can read more of that in 2009! and Mobipocket post).

So anyway….that’s all I have for the month of February. I had to jump on here today to get something in for February, since I’ve been trying to figure out my next steps. I don’t want to miss a month 🙂

Till later…!!