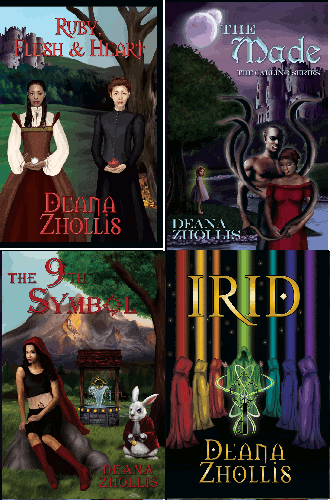
 I’ve put together how my book was constructed for the Kindle. I used the preview in Kindle to make sure it looks okay.
NOTE: Want to watch an Instruction Video for the below that has a template? Just go to Deana Zhollis Writing Tools.
The first step for the html programming I found on Critique Circle. I’m not a member. I actually was looking for something else and found this nifty way of getting your MSWord ready for html. If you use the MSWord converter, it just creates a whole lot of garbage html stuff that you really don’t need. Thus, if I had known this neat and quick way to change my MSWord to html WITHOUT loosing my italics, I surely would have used it instead of copying and pasting each-and-every-chapter into my Dreamweaver (for FREE html software, try out Kompozer. I downloaded it and it works great!), and then I had to compare my MSWord document to the HTML to put the darn formats back in. Not fun. But this now saves me a lot of headaches.
I’ve edited Critique Circle’s instructions to make it more general.
STEP 1
You can convert bold, italics, underline and centered text in MS Word to html formatted text before copy/pasting your text into your html programming/code window. In this way, you will not loose your italics, for example, when you copy/paste. The below instruction explains how to do this with bold and then you can use the same steps for the other formats
To do that, open up MSWord document and then open your find-replace option (CTRL-H), and make sure you are working in a throwaway copy of your manuscript so that you don’t accidentally save over it.
In the find-replace dialog, make sure you have your focus in the “Find What” text box (just click it) and then click on the “More” button, at the bottom of the dialog. There is a “Format” drop-down button. Click that and select “Font”. Now, select “Font Style” and then “Bold” and click OK.
NOTE: There is an easier way. You can press CTRL-B to toggle bold, CTRL-i to toggle italics, CTRL-u to toggle underline and CTRL-e to toggle centered. Just remember to have your focus on the “Find what” box and use the “Clear formatting” or “No formatting” to clear out previous formatting before entering a new one (ex. it might say “Not Bold”, which is not the same as not searching for bold text. In this case you should hit CTRL-B again to clear the bold flag)
Under the “Find What” text box, you should now see “Format: Font: Bold”.
In the “Replace With” text box, enter [b]^&[/b] and click “Replace All”.
This will find every piece of Bold formatted text and encase it with [b] and [/b].
Do the same with italics, underline and center (that’s in the “paragraph” option group). In every case, make sure that the option you had before is no longer selected, so that only bold, italics or centered is shown below the “Find What” text box.
Even if you have text that is italics _and_ bold you use the same method.
Here are the codes you want to put into “Replace With”:
Bold: <strong>^&</strong>
Italics: <i>^&</i>
Underline: <u>^&</u>
Centered: <c>^&</c>
STEP 2:
This part includes the following supported html coding the Kindle needs in order to look properly in their viewer. It will include the following things:
<a name=”TOC”/> for Table of Contents right before your Table of Contents
<a name=”start”/> for Go To Beginning where you want people to go when they first open your book
<a name=”cover”/> for Go To Cover where it will display your beautiful picture/cover of your book
<mbp:pagebreak/> for Page Breaks, which I mentioned in an earlier post
I researched if I needed to put the cover (<a name=”cover”/>) in my book or not. I couldn’t find anywhere where people were leaning more to the “to do” or “not to do”, so I left the cover out in my Kindle version. I can always insert the picture later on if I want. I read somewhere that I could put the cover at the end of the book, so that’s where I put it in the example below.
It also includes:
- Table of Content in HTML
- A bullet list in HTML
- Dropped Case in HTML (The first letter of a chapter enlarged or larger)
- A Glossary
- A Prologue
- About the Author
- And stuff to put before the story begins (ISBN Number, Dedication, Website etc)
So, here goes my code. Hope it’s helpful.
|
<head> <meta http-equiv=”Content-Type” content=”text/html;charset=iso-8859-1″ /> <title>{Enter your Title of Book here}</title> </head> <body> <center><h2>{Enter Prologue Title Here}</h2></center> <br> <p>{Start the prologue text here}</p> <p>{And keep on typing it all up}</p> <hr /> <mbp:pagebreak /> <br /> <p>This book is a work of fiction. Names, characters, places, and incidents are the product of the author’s imagination or are used fictitiously. Any resemblance to actual events, locales, or persons, living or dead, is coincidental.</p> <br> <br> ISBN 10: {Enter Number}<br> ISBN 13: {Enter Number}<br> <br> {Title of Book here}<br> Copyright {Date} by {Author Name}<br> All rights reserved.<br> Published by {Name here}<br> http://www.{web address}<br> <br> Cover Design by {Name here}<br> http://www.{web address}<br> <mbp:pagebreak /> <br> <br> To my family and friends who …. <hr/> <mbp:pagebreak /> <center> <hr /> <font size=”+4″>{Title of Book Here}</font> <hr width=”10%” /> <font size=”+1″>by {Author Name Here}</font><br /> <hr /> <br /> </center> <mbp:pagebreak /> <center><h2><a name=”TOC”/></a>TABLE OF CONTENTS</h2></center> <br> <br> <a href=”#Ch1″>Chapter 1 {Name of Chapter}</a><br /> <a href=”#Ch2″>Chapter 2 {Name of Chapter}</a><br /> <a href=”#Ch3″>Chapter 3 {Name of Chapter}</a><br /> <hr /> <a href=”#Glossary”><font size=”+2″>Glossary of Terms</font></a><br /> <hr /> <mbp:pagebreak /> <a name=”start”/></a><h2 id=”Ch1″>Chapter 1 – {Name of Chapter here}</h2> <br /> <p><font size=”+4″><b>E</b></font>lephant went for a swim on a cool day. Begin novel story and stuff here.</p> <p>Last Line of the chapter is here.</p> <p> <br /> <mbp:pagebreak /> <h2 id=”Ch2″> Chapter 2 – {Name of Chapter here}</h2> <br /> <p><font size=”+4″><b>T</b></font>he sun went up and then down again.</p> <p>Last Line of chapter and 1st part of book here.</p> <p align=”center”><strong><em>The End</em></strong></p> <hr /> <mbp:pagebreak /> <h2 id=”Glossary”>Glossary of Terms</h2> <p><strong>Magic:</strong> Used thooughout the entire Novel to make things sparkle and look pretty.<br /> Examples of certain techniques: <ul> <li>Song ability</li> <li> Animal ability</li> <li> Water ability</li> </ul> <p><strong>Poor:</strong> An individual in a state of despair and desperation.</p> <hr /> <mbp:pagebreak /> <h2 align=”center”>About the Author</h2> <p> </p> <p>Lori Jones is an instructor for elephant painting and dancing <hr /> <mbp:pagebreak /> <center> <h1>Other Books</h1> Elephant? Where are you?<br> <br> <strong><font size=”3″>(Coming Soon…)</font></strong><br> Elephant – Together at Last<br> Mice and Elephant<br> <br> <br> <strong><font size=”4″>The Tusk Series</font></strong><br> <br> Tusk – White and Shiny!<br> <br> </center> <a name=”cover”/><img src=”http://www.zhollis.com/images/TheMadewebsite.jpg” alt=”TheMade” longdesc=”TheMade.htm”> </body> </html> |
Below Code is for Multiple Books within a Novel. It also includes:
- Table of Content in HTML
- A bullet list in HTML
- Dropped Case in HTML (The first letter of a chapter enlarged or larger)
- A Glossary
- A Prologue
- Book I and Book II (Book II has the Chapter Numbers starting from 1 again)
- About the Author
- And stuff to put before the story begins (ISBN Number, Dedication, Website etc)
So, here goes my code. Hope it’s helpful.
|
<head> <meta http-equiv=”Content-Type” content=”text/html;charset=iso-8859-1″ /> <title>{Enter your Title of Book here}</title> </head> <body> <center><h2>{Enter Prologue Title Here}</h2></center> <br> <p>{Start the prologue text here}</p> <p>{And keep on typing it all up}</p> <hr /> <mbp:pagebreak /> <br /> <p>This book is a work of fiction. Names, characters, places, and incidents are the product of the author’s imagination or are used fictitiously. Any resemblance to actual events, locales, or persons, living or dead, is coincidental.</p> <br> <br> ISBN 10: {Enter Number}<br> ISBN 13: {Enter Number}<br> <br> {Title of Book here}<br> Copyright {Date} by {Author Name}<br> All rights reserved.<br> Published by {Name here}<br> http://www.{web address}<br> <br> Cover Design by {Name here}<br> http://www.{web address}<br> <mbp:pagebreak /> <br> <br> To my family and friends who …. <hr/> <mbp:pagebreak /> <center> <hr /> <font size=”+4″>{Title of Book Here}</font> <hr width=”10%” /> <font size=”+1″>by {Author Name Here}</font><br /> <hr /> <br /> </center> <mbp:pagebreak /> <center><h2><a name=”TOC”/></a>TABLE OF CONTENTS</h2></center> <br> <br> <p>BOOK I: </p> <a href=”#Ch1″>Chapter 1 {Name of Chapter}</a><br /> <a href=”#Ch2″>Chapter 2 {Name of Chapter}</a><br /> <a href=”#Ch3″>Chapter 3 {Name of Chapter}</a><br /> <br> <p>BOOK II: </p> <a href=”#Ch1_1″>Chapter 1 {Name of Chapter}</a><br /> <a href=”#Ch1_2″>Chapter 2 {Name of Chapter}</a><br /> <a href=”#Ch1_3″>Chapter 3 {Name of Chapter}</a><br /> <br /> <a href=”#Glossary”><font size=”+2″>Glossary of Terms</font></a><br /> <mbp:pagebreak /> <center> <hr /> <font size=”+4″>BOOK I</font> <hr /> </center> <mbp:pagebreak /> <a name=”start”/></a><h2 id=”Ch1″>Chapter 1 – {Name of Chapter here}</h2> <br /> <p><font size=”+4″><b>E</b></font>lephant went for a swim on a cool day. Begin novel story and stuff here.</p> <p>Last Line of the chapter is here.</p> <p> <br /> <mbp:pagebreak /> <h2 id=”Ch2″> Chapter 2 – {Name of Chapter here}</h2> <br /> <p><font size=”+4″><b>T</b></font>he sun went up and then down again.</p> <p>Last Line of chapter and 1st part of book here.</p> <mbp:pagebreak /> <center> <hr /> <font size=”+4″>BOOK II:</font> <hr /> </center> <mbp:pagebreak /> <h2 id=”Ch1_1″>Chapter 1 – {Name of Chapter here}</h2> <br /> <p><font size=”+4″><b>S</b></font>arah found a wonderful shade next to the elephange</p> <p>Last line of Chapter here.</p> <mbp:pagebreak /> <h2 id=”Ch1_2″>Chapter 2 – {Name of Chapter here}</h2> <br /> <p><font size=”+4″><b>W</b></font>ater fell down from the elephant into her eyes</p> <p>Last line of Chapter here and last line of the entire book. Hurray! You’re finished! Good job!<br /> <br /> <br /> <p align=”center”><strong><em>The End</em></strong></p> <hr /> <mbp:pagebreak /> <h2 id=”Glossary”>Glossary of Terms</h2> <p><strong>Magic:</strong> Used thooughout the entire Novel to make things sparkle and look pretty.<br /> Examples of certain techniques: <ul> <li>Song ability</li> <li> Animal ability</li> <li> Water ability</li> </ul> <p><strong>Poor:</strong> An individual in a state of despair and desperation.</p> <hr /> <mbp:pagebreak /> <h2 align=”center”>About the Author</h2> <p> </p> <p>Lori Jones is an instructor for elephant painting and dancing <hr /> <mbp:pagebreak /> <center> <h1>Other Books</h1> Elephant? Where are you?<br> <br> <strong><font size=”3″>(Coming Soon…)</font></strong><br> Elephant – Together at Last<br> Mice and Elephant<br> <br> <br> <strong><font size=”4″>The Tusk Series</font></strong><br> <br> Tusk – White and Shiny!<br> <br> </center> <a name=”cover”/><img src=”http://www.zhollis.com/images/TheMadewebsite.jpg” alt=”TheMade” longdesc=”TheMade.htm”> </body> </html> |
Okay. So, that’s what I used for my three (3) books for formatting. I hope this helps you guys out there with formatting from MSWord to HTML a little easier.
Note: the image html would look more like:
<a name=”cover”/><img src=”[imagenamehere].jpg” alt=”[ImageNameHere]”>
To see what it will look like, click <<here>>
Until next time…

